
After considerable interest in my Facebook post on our pearl oyster mushrooms, I have decided to write some general instructions to growing oyster mushrooms.
Keep up with my mushroom growing (and writing and other things) on Twitter (@markzyi)
Note: Many of these techniques can also be used for other edible mushrooms.
Oyster Mushroom basic biology
Pleurotus ostreatus is a edible saprophytic fungus, meaning it processes dead organic matter through active endocytosis of materials into the hyphae. Since there are no UK-native mushrooms which look similar, it is a good candidate to begin exploring fungi cultivation. Moreover, it is a fast coloniser and out competes many bacteria and other fungi.
Remember that spores are the reproductive material of fungi. Spores make contact and develop filamentous hyphae growth. Hyphae facilitate digestion but also physical expansion of the organism. Collectively, hyphae are called mycelium, much like the microscopic hierarchy of human myocytes and muscle fibres.
Like many biological systems, the growth of mycelia follow a sigmoid shaped graph. This is called the spawn run. Once the mycelia run out of substrate (as in the case for containers), they are stimulated to reproduce and fruit. The mushroom is thus the fruit of the fungi. The mushroom then produces spores and the cycle restarts.
Spawn

Also known as fungi mycelium, this is the most common starting point for growing mushrooms. Like a bacterial culture, mycelia allows inoculation of a substrate. By far the easiest way to obtain spawn is through an online supplier, and there are many available.
Generally, they will come in three forms:
1. Sawdust spawn: grown on sterilised sawdust
2. Grain spawn: grown on sterilised wheat, millet, rye or rice
3. Plug spawn: grain spawn which is then used to inoculate wooden dowels. This is used to make mushroom logs but this is a topic for another time.
Substrate

Theoretically, any dead organic matter can be used. Commonly, straw is used commercially. This is because it is cheap to obtain (as a byproduct of growing grain). A key consideration is the need to pasteurise the substrate. This kills of many but not all microorganisms, and allows the mycelia to gain a head start and out compete other microorganisms.
Some commonly used substrates include:
• Straw: raw or pellets. Pellets have the advantage of being already pasteurised by the pelletisation process and thus saves a step for the home grower.
• Coffee grounds: If less than one day old, spent coffee grounds are pasteurised by the brewing process and can be used effectively for oyster mushrooms. Older grounds require pasteurisation. A good method may be to add coffee grounds to the container at intervals once the mycelium has had their chance to colonise the substrate.
• Hardwood: briquettes, chips, whole logs. These are also good substrates, but will take a longer time to colonise and fruit. Wood chips require pasteurisation. Briquettes are produced in a similar fashion to straw pellets and are already pasteurised.
• Paper and cardboard: This is possible, but yields are low. There are examples of oyster mushrooms grown on old books. Using your old biology textbooks is probably not a good idea though…
Pasteurisation can be done with heat or with chemicals. Hot water baths are an easy way of pasteurisation, depending on the amount of substrate used. Straw may be placed in a cloth sack and submerged in hot water >60C for 1–2 hours. For larger operations, chemicals are used. Nowadays, I use chopped straw submerged in water for 24 hours in a barrel with about a cup of hydrated lime. This raises the pH significantly and pastuerisation is achieved. Also, we usually have a small supply of straw as we use it for our chicken run too.
Fermentation is another option for woodchips. These are placed into a container and submerged in water for 10–14 days. This kills aerobic bacteria. After this period, they are removed from submersion. This then kills the anaerobic bacteria and thus reduces the microbial load significantly.
Growing containers

Any container with a lid can be used. I used 1kg yoghurt pots (we go through 1 pot a week so have collected many over the years) and 3.5L buckets from disinfectant wipes (these were thrown out by the hospital after use). Commercial growers use plastic bags, but this seems environmentally less friendly than recycling used plastic containers.
During the spawn run, the mycelium requires high humidity and a little bit of air flow, but light is not needed. For the 3.5L buckets, I therefore used a double bucket system (from Milkwood farm: https://www.milkwood.net/2012/07/16/growing-oyster-mushrooms-in-a-bucket/). The inner bucket was drilled with holes. I used 13mm, but larger sizes can be used. The key consideration is the balance between surface area exposed for moisture loss, and area from which the mushrooms can fruit from. Additional smaller holes were drilled in the bottom for drainage. Standing water in a closed environment promotes anaerobic bacterial growth and competes with your fungus.
For the yoghurt pots, I did not drill fruiting holes (but ended up with some anaerobic contamination). Instead, the lid was closed for the spawn run and opened after the spawn run for fruiting. Drainage holes at the bottom are recommended to prevent an anaerobic environment.
Growing process

You will need:
• Means of disinfecting the containers: alcohol or disinfectant wipes, or dishwashing liquid
• Mycelium/spawn. I had 1kg bags of sawdust spawn
• Pasteurised substrate. I had straw pellets. These are originally used as horse bedding.
• Water (if using straw pellets)
• Containers. I had 1kg yoghurt pots and 3.5L disinfectant wipe buckets
• A dark place with high humidity: double bucket system, or trash bag over container. Dark cupboard or similar space to allow spawn run to occur.
Described here is the dry mix method.
First, I cleaned the containers with antiseptic wipes. Alcohol wipes are useful, so are disinfectant wipes. Theoretically, dishwashing liquid would probably suffice.
Next, inoculation. You will find different inoculation ratios over the internet. I have used between 20–50% spawn:substrate ratio in weight, with success. The more spawn, the faster the colonisation and less chance of contamination. However, spawn is the most expensive part of this project so keep that in mind.
For this project I used:
150–250g spawn to 700g dry straw pellets for 3.5L buckets
50g spawn to 250g dry straw pellets for 1kg yoghurt pots
Dry mix the spawn and dry straw pellets in the container.
Add water: 2.2L per 1kg of dry pellets. Add 1st half of water then wait 15 minutes for pellets to partially rehydrate before adding the 2nd half of the water. This ensures the pellets at the top of the container also soak up the water. Remember that the drainage hole should be covered for this! This is why the double bucket system is useful. Alternatively, use tape to cover the hole temporarily, or drill the hole after rehydration.
Close the container. Let sit for between 2–8 weeks. Provide a dark humid environment. This can be done using several methods:
• Double bucket method as described above
• Put entire container into a plastic bag with a stick on top to provide some air flow around the container. This allows some evaporation and helps prevent stagnant water and an anaerobic environment.
• Mist the openings daily if not enclosed.
• Put containers in a green house or cupboard to increase humidity.
• Live in rainy Manchester….or Wales I guess…
The spawn run is fascinating. Within a few weeks, you should see white mycelium colonising the substrate. Several sources say not to disturb the mycelium too much during the spawn run. This is probably wise as every intervention introduces other spores and microorganisms in the environment to the closed container. The substrate is fully colonised when there is an almost solid white mat visible and the substrate is almost no longer visible. It is then ready for fruiting. The timing to remove the outer bucket or uncover the lid is not entirely fixed. Some sources say to wait for a completely white mat, while others keep their containers uncovered during the entire spawn run and just provide a humid environment. Still others use plastic bags and slit them when read to fruit.
Fruiting


Once the substrate is fully colonised, it is time to induce fruition. Several factors are required for good fruiting, but even within literature, not everything is fully understood about it. Known factors:
• Lowering of CO2. This is achieved by opening the bucket/container
• A bit of sunlight
• Mild drop in humidity from close to 100% to around 70%. This is controlled in commercial enterprises but for the backyard mushroom maestro, keeping it in a greenhouse or similar is sufficient. Occasional misting with water may prevent mushrooms from drying out.
• Increase in fresh air flow. My aldi greenhouse has riveted holes in the top and bottom to allow this, I also leave the flap unzipped but down sometimes. Leaving it completely open will attract flies.
In a few days to a week, you should start to see pins. These are the initial heads of mushrooms which will expand and grow to full size. Keep a close eye on them during this time. In a greenhouse, the time from pin to harvest can take 1–2 days, but may take up to a week otherwise. Maintaining humidity is important to prevent mushrooms themselves from drying out, but too much moisture will encourage other moulds and undesirable microorganisms.
Harvest


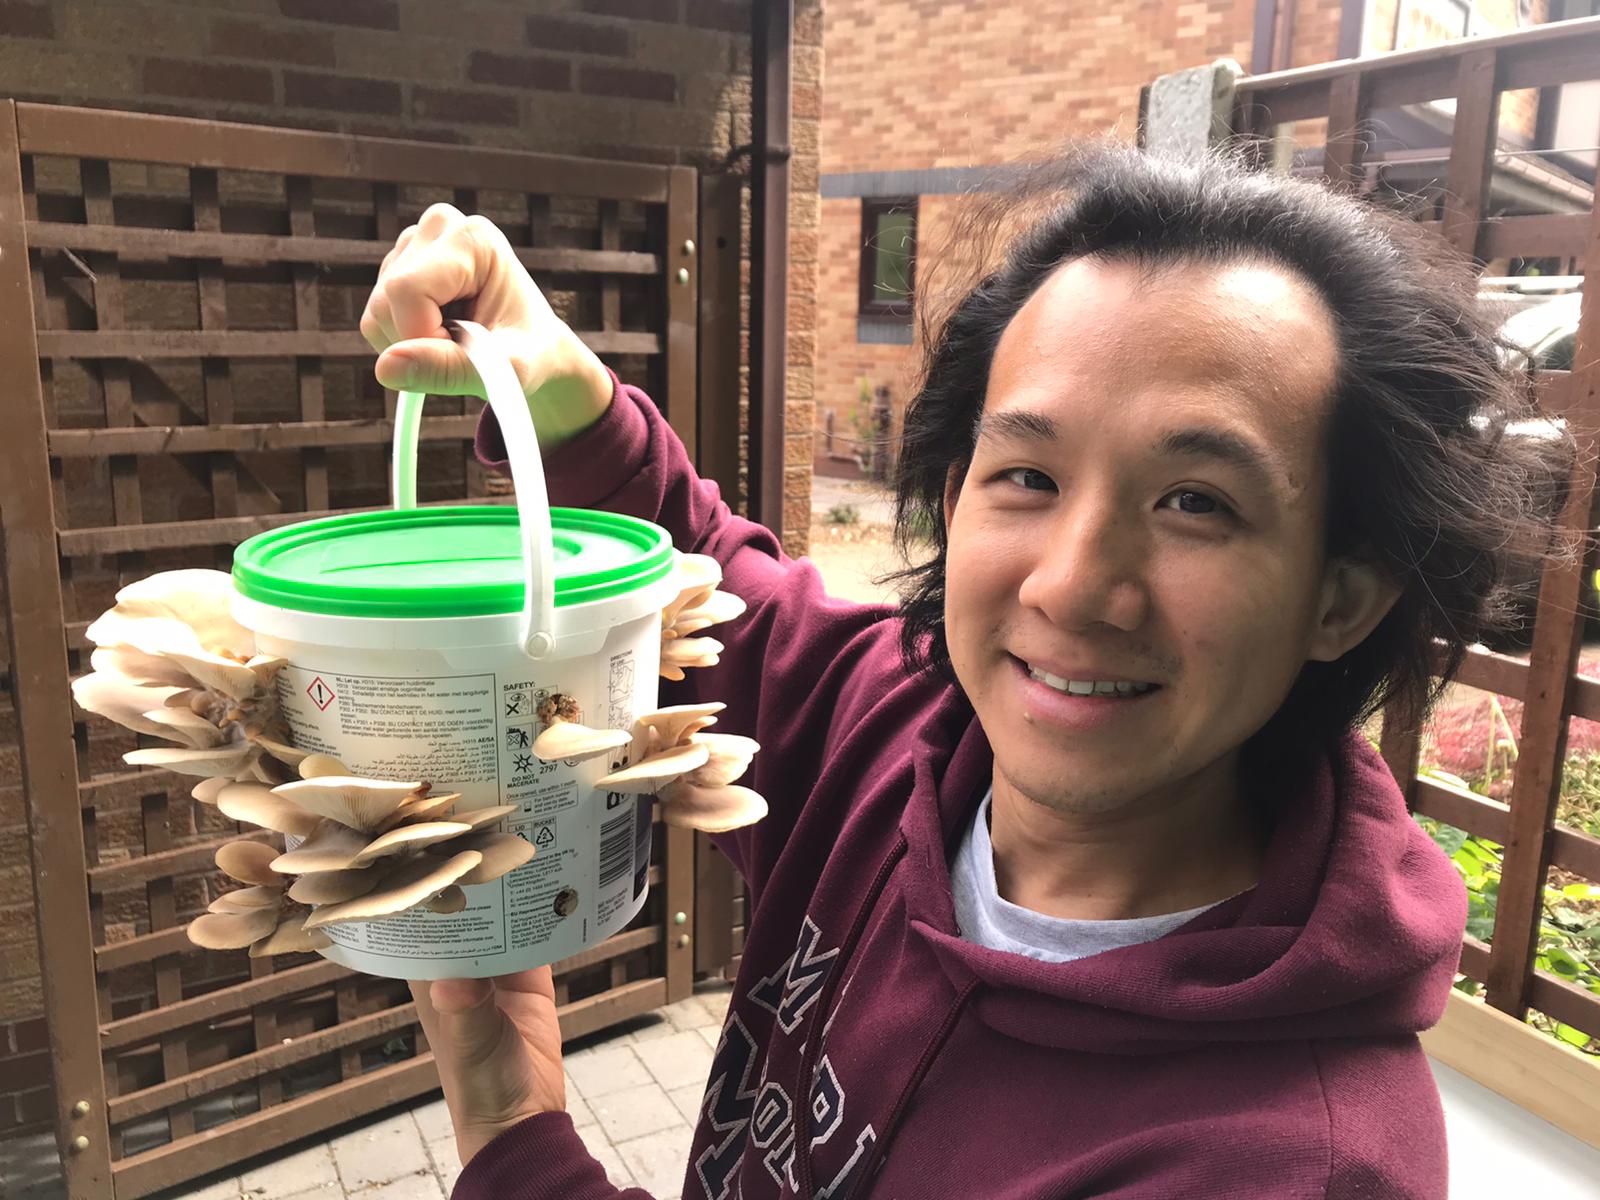
Your oyster mushrooms are ready just before the caps turn upwards. This is when they are largest but also firmest. After their caps turn upwards, they get less firm and start to drop spores.
Cut the entire cluster of mushrooms with a knife, or if they are growing out of holes on the side of your bucket, twisting them off is also possible.
Cooking and eating

Oh the possibilities are endless! Here are some ideas.
Fried in olive oil, sliced mushrooms have an earthy taste and meaty texture. Large slices look similar to fried chicken breast.
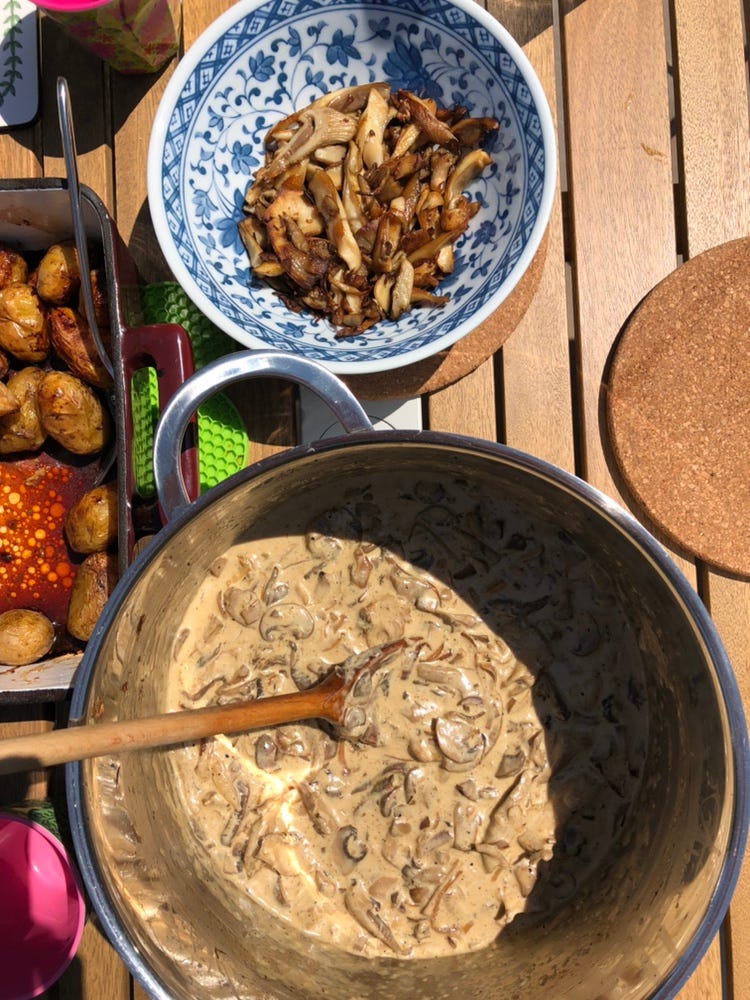
Mushroom stroganoff. Sliced, fried then add some cream into the pot. Season with salt and pepper: lovely.
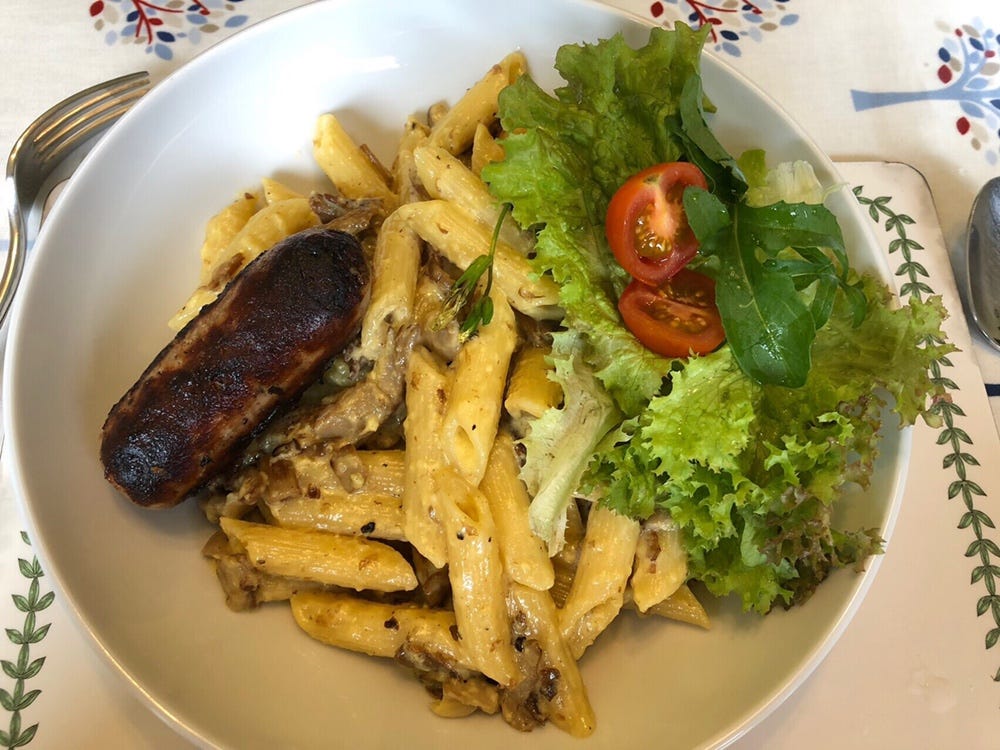
Sliced and fried mushrooms as pizza toppings are delicious and make for a vegetarian alternative to meat.
Fried with pak Choi in soy sauce and rice wine, makes a simple and clean dish to go with rice.
Mushroom carbonara is amazing. When cut into small cubes and fried, they do a fantastic job mimicking bacon.
We have also cooked them in curries and stews.
However you choose to cook, they are way better than those in the supermarket, if you consider that it probably takes a few days for the mushrooms to get from farm to the supermarket.


In the fridge, they will store up to a week if you keep them dry.
Pitfalls and lessons
Stick to one species while learning. Each fungi has its own growth requirements including humidity, light, substrate etc. I tried king oysters and enoki at the same time as the pearl oysters, but quickly learnt that both of those require hardwood to get proper fruiting.
As a typical intensivist, I’m impatient. I got worried when after 3 weeks I didn’t see full colonisation. I realised that my sources wrote from their experiences in a warm climate and I failed to take into account the slower growth rates in a cooler climate.
Don’t overfill your containers! Straw pellets expand a lot. This makes the environment anaerobic and increases the risk of contamination. Moreover, we cracked the bottom of a couple of yoghurt pots from making it too full.
Your children may love to see the mushrooms grow, but may not like to eat them….like ours…
Fungi are remarkably resilient, just as we know in clinical practice. A little bit of mold or other unwanted fungi growth around will not hinder the fruiting of the oyster mushrooms.
I’m in the process of trying other cultivation methods so check back soon!
Links and references
Growing Gourmet and Medicinal Mushrooms. Paul Stamets. This is the ultimate reference text for all things fungi.
https://www.milkwood.net/. Great site for practical permaculture
https://www.annforfungi.co.uk/. UK based supplier
https://www.gourmetmushrooms.co.uk/. Mushroom supplier.


[…] Read about my oyster mushroom method here: MOMMY […]
[…] It’s been sevveral years since I wrote Mark’s Oyster Mushroom MethodologY (MOMMY). […]